Create a robust object localization using "matching" just a few clicks away.
- Terry Tham

- Jul 9, 2020
- 1 min read
Updated: Jul 13, 2020
"Matching" provides a robust method to locate objects in images, which can be used for many different purposes. The main idea of matching is to use a prototype object (template), create a model, and search this model in other images.
There are 4 matching approaches to target different object presentations in the image:
1. Correlation-based matching
2. Shape-based matching
3. Deformable matching
4. Desctiptor-based matching
In this tutorial, users are expected to create camera channels and inspection sequences. If you need to create your vision system please refer to here before continuing. In this example, the object to be located is a nut from a group of gear rings, washers, and nuts.
Step 1: Add the Image Acquisition Tool & Configure.
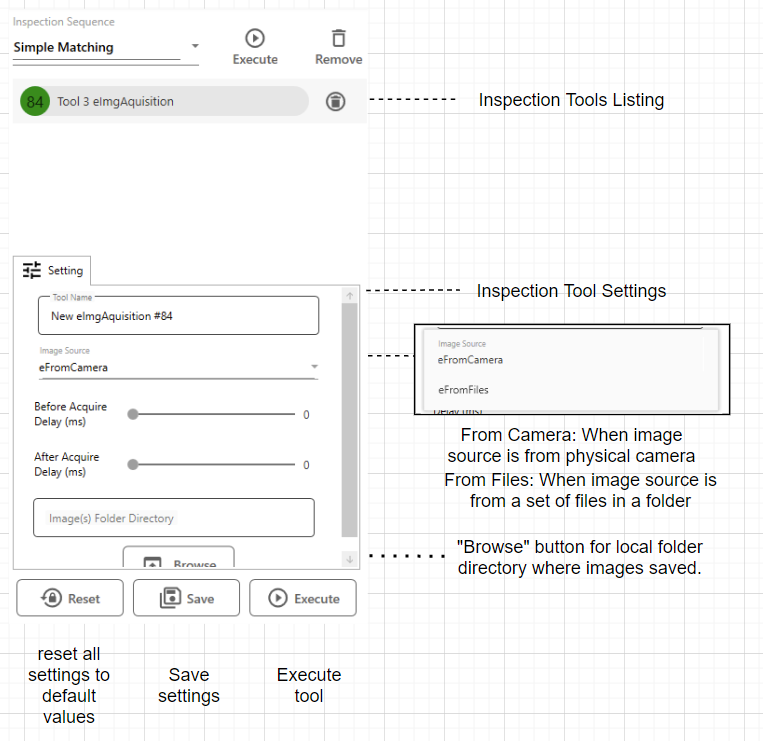
Add the Image Acquisition Tool by selecting the "Add Inspection Tool" button from the Main Control section, from the menu, select "Image Acquisition" and configure tool setting as shown in the following diagrams. Then, click the "Execute" button to examine - the image expected will be displayed.
Step 2: Add Match Tool & Configure.
Add "Match Tool" (in this example, we use shaped-based) by selecting the "Add Inspection Tool" button, from the menu, expand the Match menu, and select "Shaped-based matching".
That's all, the object in the image with the x, y and z coordinates will be obtained within a few milliseconds!
Did you find "matching" useful? Please let us know in your comments.
Be in the lookout for many more awesome features and tools coming soon.


Comments